R66s 编译 Openwrt 支持 EC20 R2.1 4G模块 和 GPS 模块
2022年 09月 13 日

子弹

1. 准备编译环境

采用虚拟机安装 ubuntu 系统作为编译环境

2.编译固件

源码地址:https://github.com/coolsnowwolf/lede

按照 Lean 大神的教学操作

注意

不要用 root 用户进行编译
国内用户编译前最好准备好梯子
默认登陆IP 192.168.1.1 密码 password

2.1 安装依赖

sudo apt update -y
sudo apt full-upgrade -y
sudo apt install -y ack antlr3 asciidoc autoconf automake autopoint binutils bison build-essential \
bzip2 ccache cmake cpio curl device-tree-compiler fastjar flex gawk gettext gcc-multilib g++-multilib \
git gperf haveged help2man intltool libc6-dev-i386 libelf-dev libglib2.0-dev libgmp3-dev libltdl-dev \
libmpc-dev libmpfr-dev libncurses5-dev libncursesw5-dev libreadline-dev libssl-dev libtool lrzsz \
mkisofs msmtp nano ninja-build p7zip p7zip-full patch pkgconf python2.7 python3 python3-pip libpython3-dev qemu-utils \
rsync scons squashfs-tools subversion swig texinfo uglifyjs upx-ucl unzip vim wget xmlto xxd zlib1g-dev

2.2 下载源代码,更新 feeds 并选择配置

git clone https://github.com/coolsnowwolf/lede
cd lede
./scripts/feeds update -a
./scripts/feeds install -a
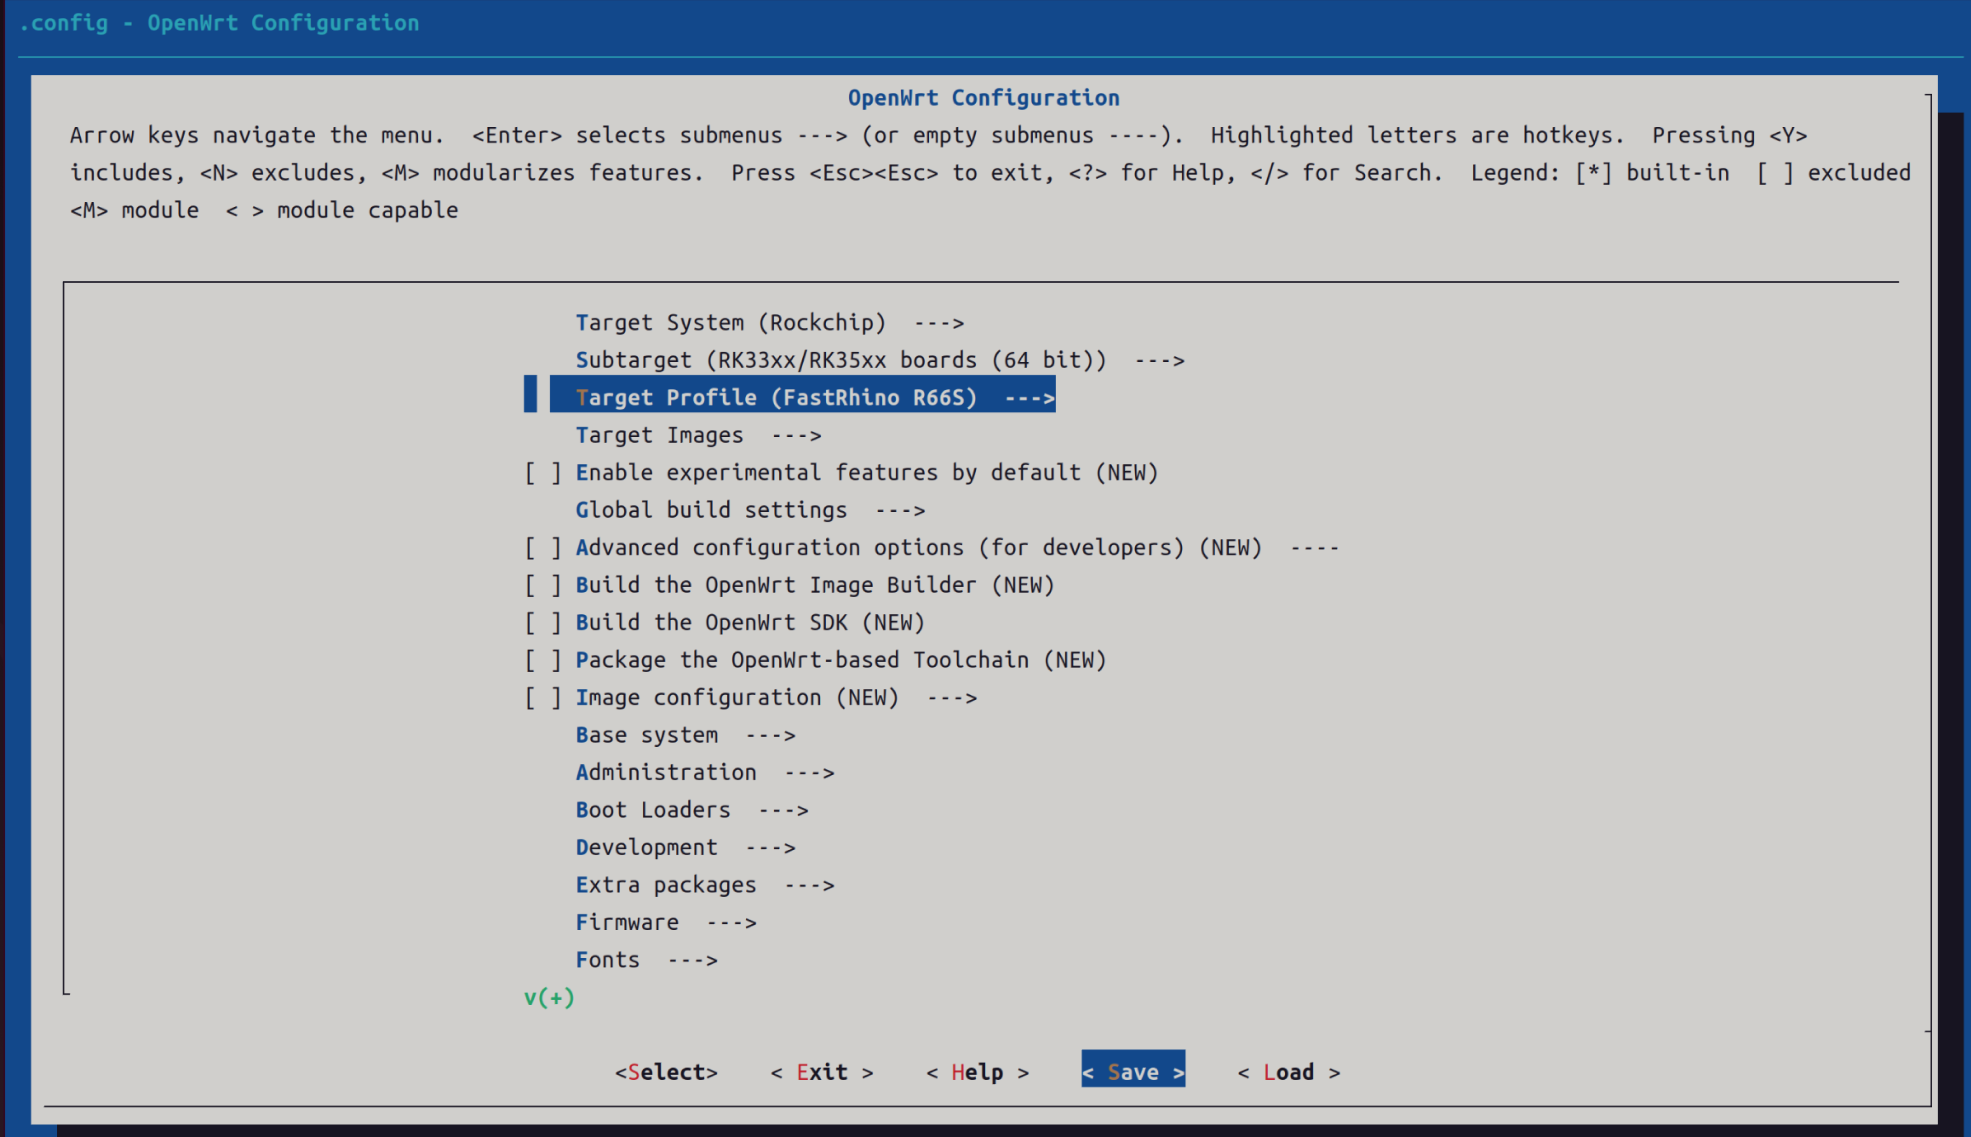
make menuconfig

运行结果应该是这样的

先设定 CPU 型号进行第一次编译测试

  • Target System

    • Rockchip
  • Target Profile

    • FastRhiro R66s

保存配置

2.3 下载 dl 库,编译固件 (-j 后面是线程数,第一次编译推荐用单线程)

make download -j8
make V=s -j1

第一次编译要很长时间,要耐心等待,见到下述内容说明编译成功了!

2.4 配置驱动、插件等

打开 [KERNEL]/drivers/usb/serial/usb_wwan.c 增加对应内容

static struct urb *usb_wwan_setup_urb(struct usb_serial *serial, int endpoint,
int dir, void *ctx, char *buf, int len,void (*callback) (struct urb *))
{
……
usb_fill_bulk_urb(urb, serial->dev,
usb_sndbulkpipe(serial->dev, endpoint) | dir,
buf, len, callback, ctx);
#if 1 //Added by Quectel for zero packet
if (dir == USB_DIR_OUT) {
struct usb_device_descriptor *desc = &serial->dev->descriptor;
if (desc->idVendor == cpu_to_le16(0x2C7C))
urb->transfer_flags |= URB_ZERO_PACKET;
}
#endif
return urb;
}

打开 [KERNEL]/drivers/usb/serial/option.c 增加对应内容

static struct usb_serial_driver option_1port_device = {
……
#ifdef CONFIG_PM
.suspend = usb_wwan_suspend,
.resume = usb_wwan_resume,
#if 1 //Added by Quectel
.reset_resume = usb_wwan_resume,
#endif
#endif
};
static int option_probe(struct usb_serial *serial, const struct usb_device_id *id) {
struct usb_wwan_intf_private *data;
……
#if 1 //Added by Quectel
//Quectel modules’s interface 4 can be used as USB network device
if (serial->dev->descriptor.idVendor == cpu_to_le16(0x2C7C)) {
//some interfaces can be used as USB Network device (ecm, rndis, mbim)
if (serial->interface->cur_altsetting->desc.bInterfaceClass != 0xFF) {
return -ENODEV;
}
//interface 4 can be used as USB Network device (qmi)
else if (serial->interface->cur_altsetting->desc.bInterfaceNumber >= 4) {
return -ENODEV;
}
}
#endif
/* Store device id so we can use it during attach. */
usb_set_serial_data(serial, (void *)id);
return 0;
}
make menuconfig
  • Kernel modules

    • USB Support

      • kmod-usb-core
      • kmod-usb-net
      • kmod-usb-net-qmi-wwan
      • kmod-usb-net-cdc-ether
      • kmod-usb-net-rndis
      • kmod-usb-ohci
      • kmod-usb-serial
      • kmod-usb-serial-ch341
      • kmod-usb-serial-option
      • kmod-usb-serial-qualcomm
      • kmod-usb2
  • Languages

    • Languages

      • python3
      • python3-pip
  • LuCI

    • Applications

      • luci-app-ttyd
      • luci-app-zerotier
    • Protocols

      • luci-proto-3g
      • luci-proto-ipv6
      • luci-proto-ppp
      • luci-proto-qmi
  • Network

    • WWAN

      • comgt
      • uqmi
  • Utilities

    • Editors

      • nano-full
    • Terminal

      • minicom
    • gpsd
    • gpsd-clients
    • gpsd-utils

保存并再次编译

make V=s -j$(nproc)

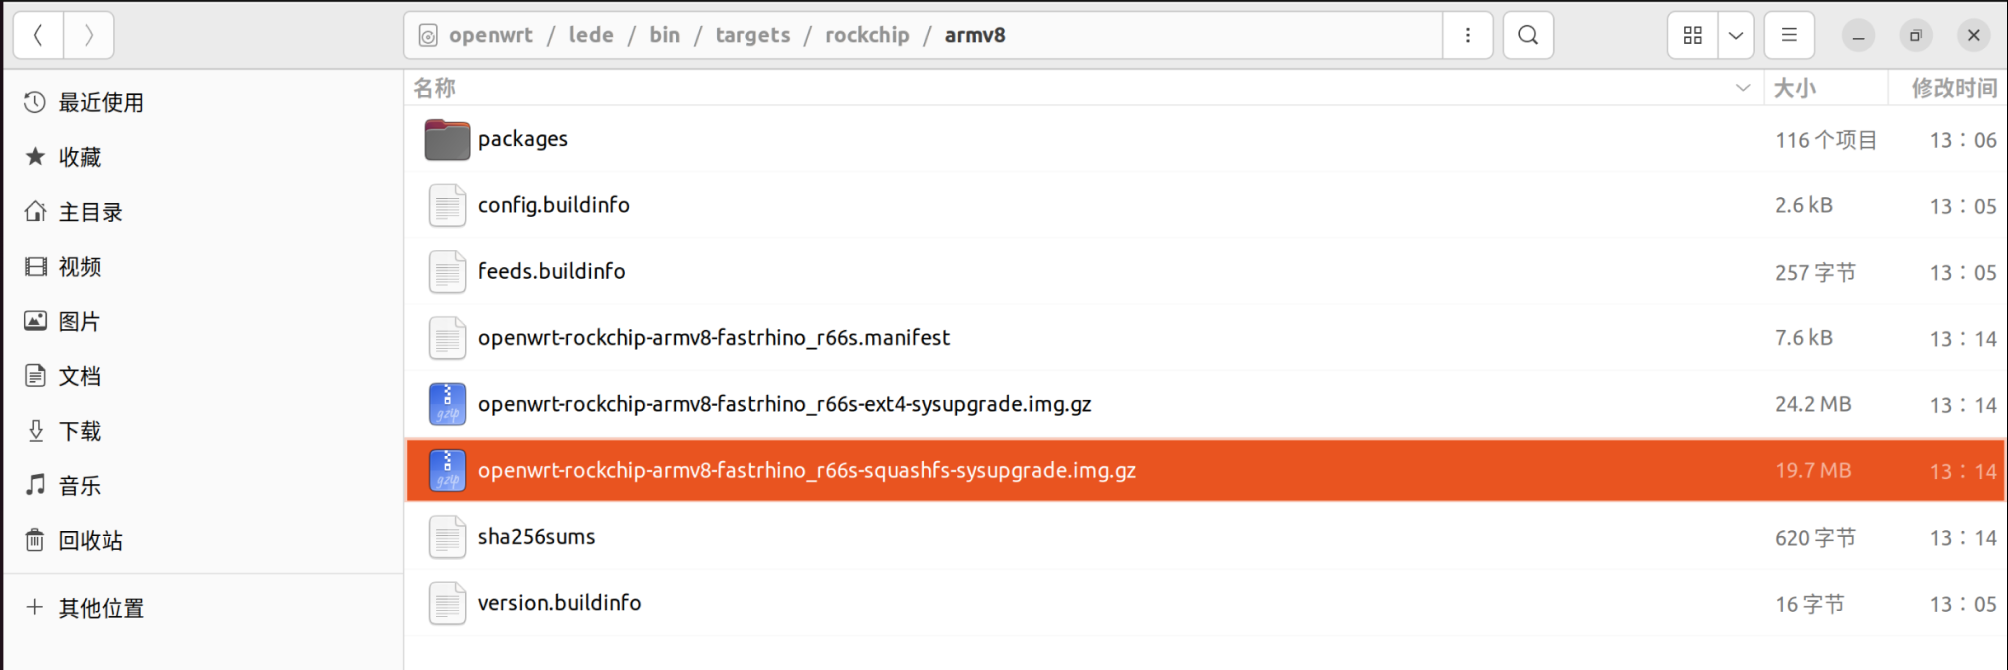
编译成功后,固件存放在此文件夹中

3. 烧录固件

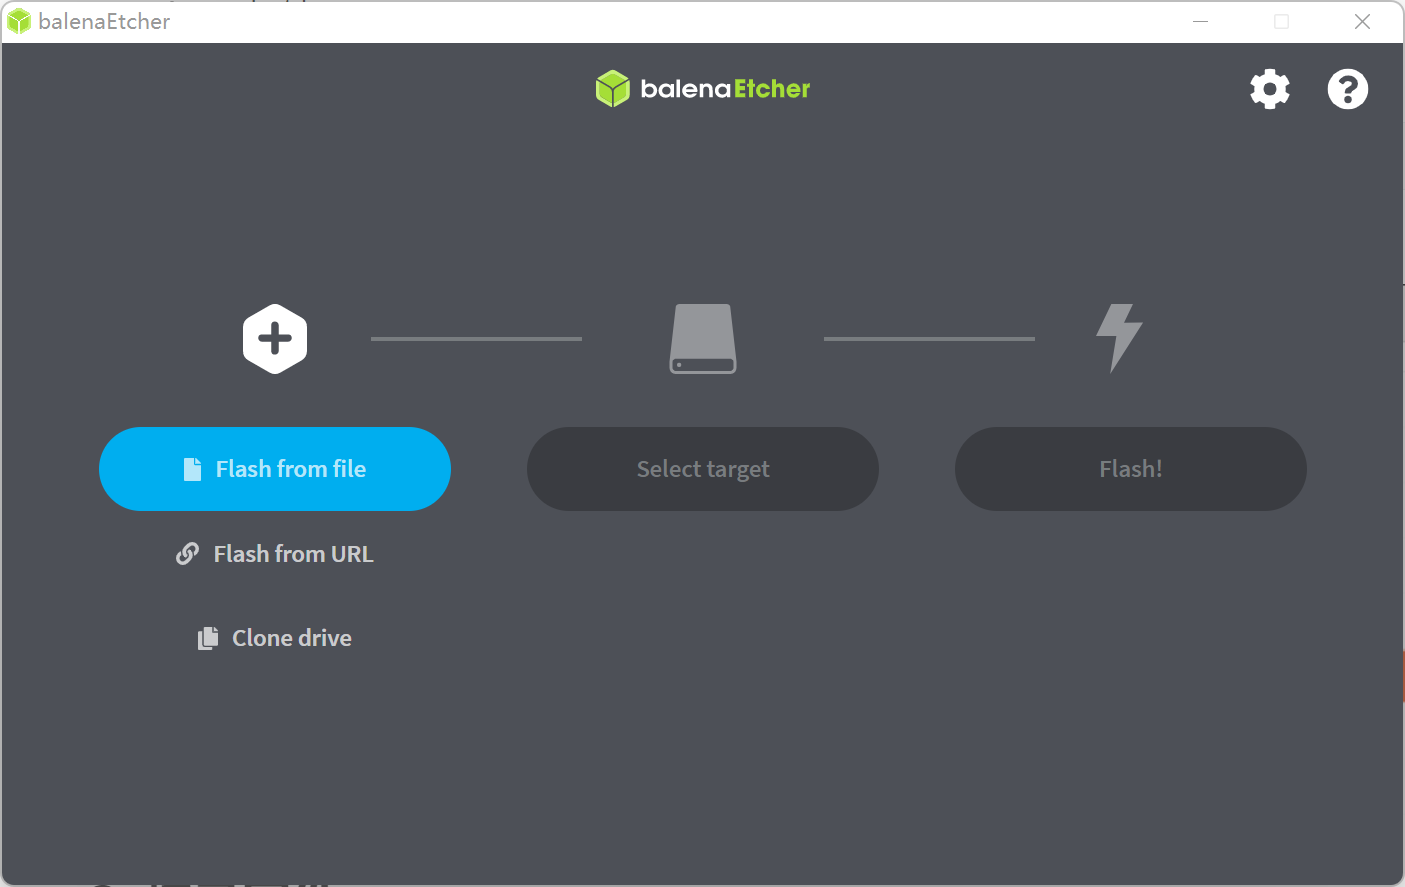
可以使用 balenaEtcher 或者 Win32DiskImager
4. 配置 Openwrt

连接网线,网段设置 192.168.1.X 或者自动获取

浏览器登录 http://192.168.1.1/

username: root

password: password
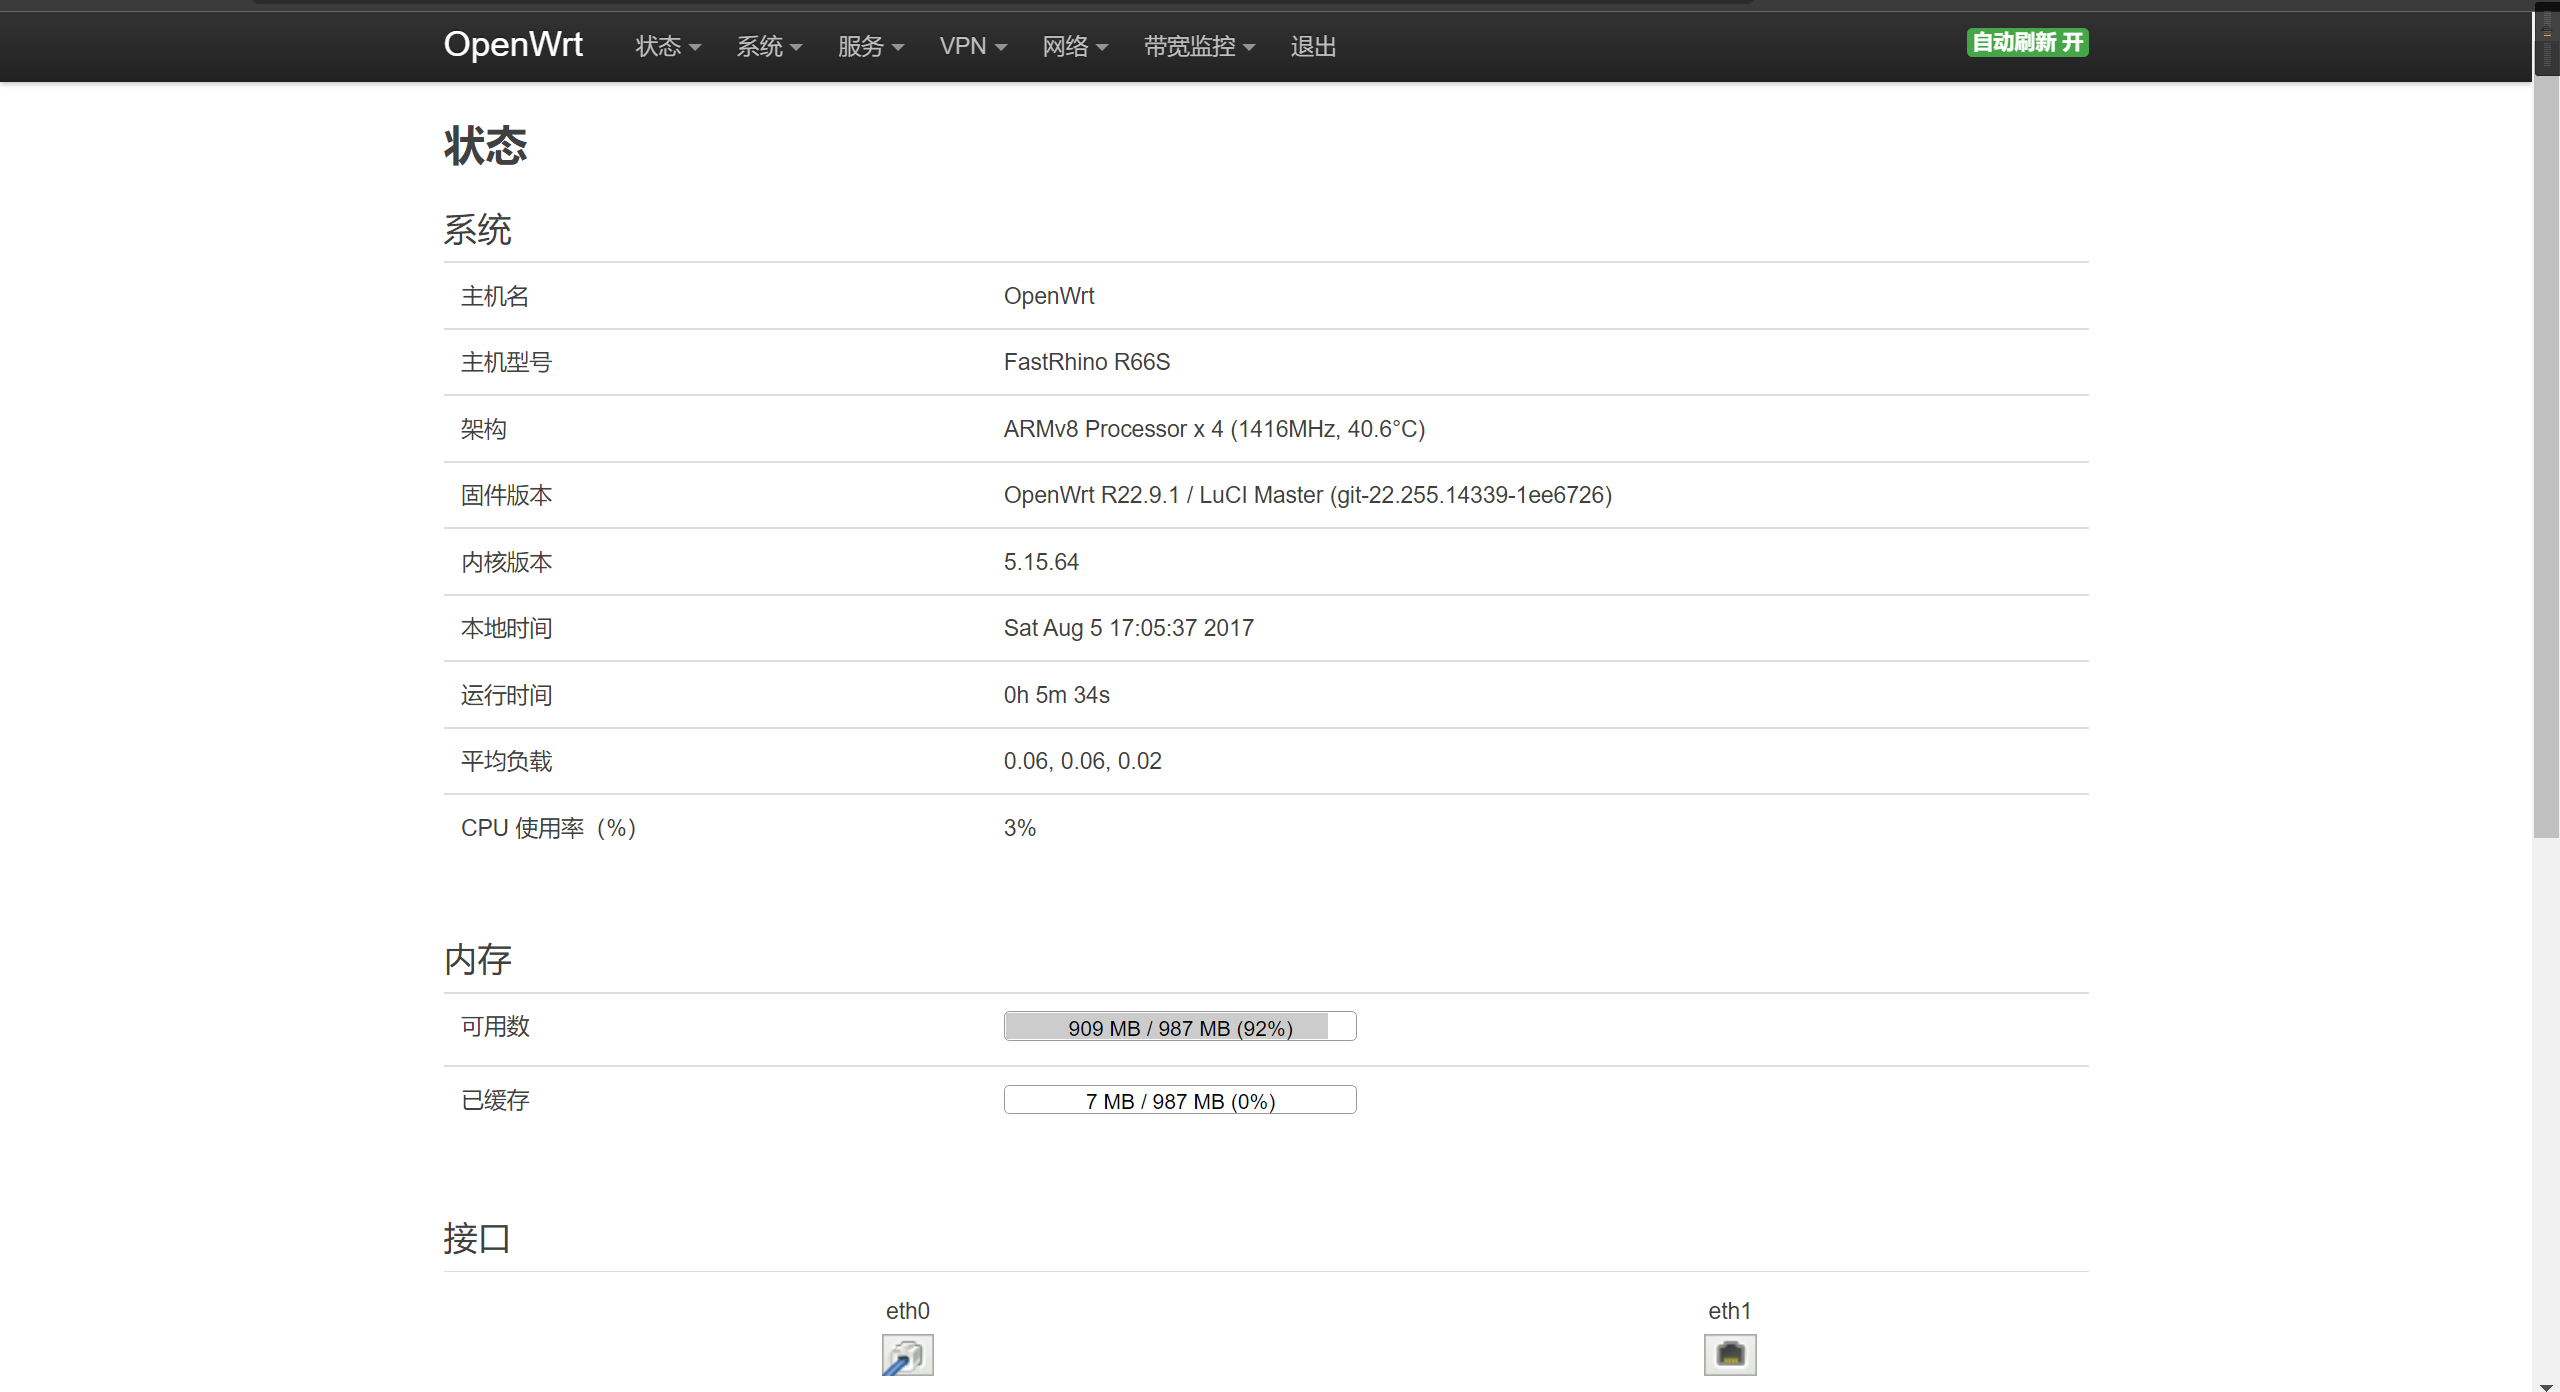
就可以进入 Openwrt 后台
4.1 配置 4G 网卡

插入 4G 上网卡

进入 TTYD 终端
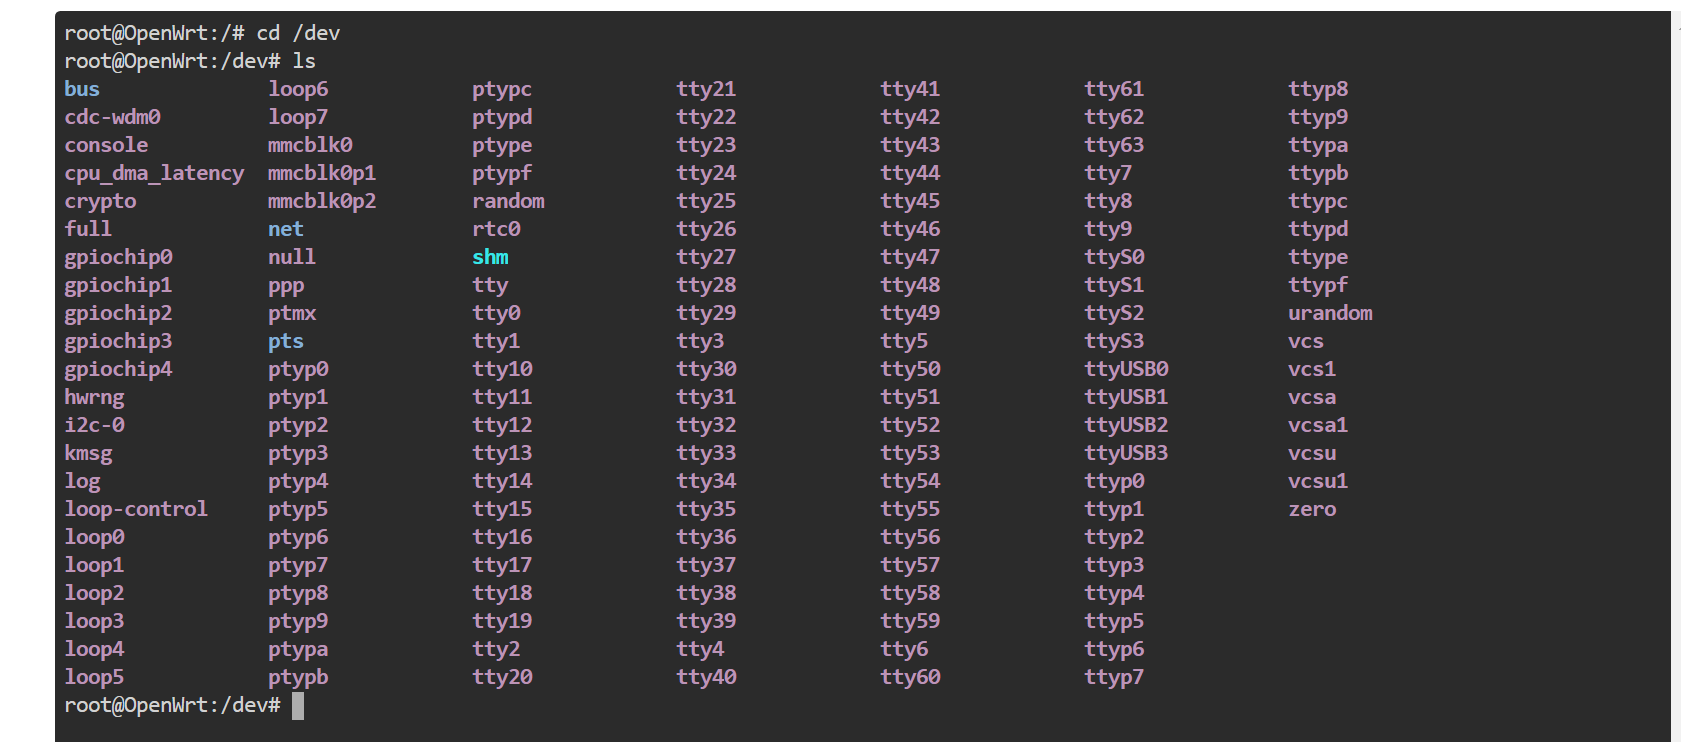
查看设备 cdc-wdm0 存在就说明驱动上了

新建一个 QMI 接口


防火墙设置为 WAN

有数据包,说明上网成功

但这还没有获取到 ipv6 地址,需要修改 /etc/config/network 文件

config interface 'LTE'
         option proto 'qmi'
         option device '/dev/cdc-wdm0'
         option apn '3gnet'
         option auth 'none'
         option pdptype 'IPV4V6'  # 增加这一条

重新连接就能获取到 ipv6 地址了

4.2 配置 GPS 模块

修改/etc/config/gpsd配置文件

1 config gpsd 'core'
2         option enabled '1'  # 改为 1
3         option device '/dev/ttyUSB0'  # GPS 的串口号
4         option port '2947'
5         option listen_globally '0'

使用/etc/init.d/gpsd start 与 /etc/init.d/gpsd enable 命令开启gpsd进程并加入自启动序列

使用 cgps -s 查看 GPS 信息

至此 Openwrt 算是安装结束了,双 LAN 口,zerotier 就自己配置了

最后测一下 4G 的速度(真心疼流量啊!)

R66s 编译 Openwrt 支持 EC20 R2.1 4G模块 和 GPS 模块

1. 准备编译环境

采用虚拟机安装 ubuntu 系统作为编译环境

2.编译固件

源码地址:https://github.com/coolsnowwolf/lede

按照 Lean 大神的教学操作

注意

不要用 root 用户进行编译
国内用户编译前最好准备好梯子
默认登陆IP 192.168.1.1 密码 password

2.1 安装依赖

sudo apt update -y
sudo apt full-upgrade -y
sudo apt install -y ack antlr3 asciidoc autoconf automake autopoint binutils bison build-essential \
bzip2 ccache cmake cpio curl device-tree-compiler fastjar flex gawk gettext gcc-multilib g++-multilib \
git gperf haveged help2man intltool libc6-dev-i386 libelf-dev libglib2.0-dev libgmp3-dev libltdl-dev \
libmpc-dev libmpfr-dev libncurses5-dev libncursesw5-dev libreadline-dev libssl-dev libtool lrzsz \
mkisofs msmtp nano ninja-build p7zip p7zip-full patch pkgconf python2.7 python3 python3-pip libpython3-dev qemu-utils \
rsync scons squashfs-tools subversion swig texinfo uglifyjs upx-ucl unzip vim wget xmlto xxd zlib1g-dev

2.2 下载源代码,更新 feeds 并选择配置

git clone https://github.com/coolsnowwolf/lede
cd lede
./scripts/feeds update -a
./scripts/feeds install -a
make menuconfig

运行结果应该是这样的

先设定 CPU 型号进行第一次编译测试

  • Target System

    • Rockchip
  • Target Profile

    • FastRhiro R66s

保存配置

2.3 下载 dl 库,编译固件 (-j 后面是线程数,第一次编译推荐用单线程)

make download -j8
make V=s -j1

第一次编译要很长时间,要耐心等待,见到下述内容说明编译成功了!

2.4 配置驱动、插件等

打开 [KERNEL]/drivers/usb/serial/usb_wwan.c 增加对应内容

static struct urb *usb_wwan_setup_urb(struct usb_serial *serial, int endpoint,
int dir, void *ctx, char *buf, int len,void (*callback) (struct urb *))
{
……
usb_fill_bulk_urb(urb, serial->dev,
usb_sndbulkpipe(serial->dev, endpoint) | dir,
buf, len, callback, ctx);
#if 1 //Added by Quectel for zero packet
if (dir == USB_DIR_OUT) {
struct usb_device_descriptor *desc = &serial->dev->descriptor;
if (desc->idVendor == cpu_to_le16(0x2C7C))
urb->transfer_flags |= URB_ZERO_PACKET;
}
#endif
return urb;
}

打开 [KERNEL]/drivers/usb/serial/option.c 增加对应内容

static struct usb_serial_driver option_1port_device = {
……
#ifdef CONFIG_PM
.suspend = usb_wwan_suspend,
.resume = usb_wwan_resume,
#if 1 //Added by Quectel
.reset_resume = usb_wwan_resume,
#endif
#endif
};
static int option_probe(struct usb_serial *serial, const struct usb_device_id *id) {
struct usb_wwan_intf_private *data;
……
#if 1 //Added by Quectel
//Quectel modules’s interface 4 can be used as USB network device
if (serial->dev->descriptor.idVendor == cpu_to_le16(0x2C7C)) {
//some interfaces can be used as USB Network device (ecm, rndis, mbim)
if (serial->interface->cur_altsetting->desc.bInterfaceClass != 0xFF) {
return -ENODEV;
}
//interface 4 can be used as USB Network device (qmi)
else if (serial->interface->cur_altsetting->desc.bInterfaceNumber >= 4) {
return -ENODEV;
}
}
#endif
/* Store device id so we can use it during attach. */
usb_set_serial_data(serial, (void *)id);
return 0;
}
make menuconfig
  • Kernel modules

    • USB Support

      • kmod-usb-core
      • kmod-usb-net
      • kmod-usb-net-qmi-wwan
      • kmod-usb-net-cdc-ether
      • kmod-usb-net-rndis
      • kmod-usb-ohci
      • kmod-usb-serial
      • kmod-usb-serial-ch341
      • kmod-usb-serial-option
      • kmod-usb-serial-qualcomm
      • kmod-usb2
  • Languages

    • Languages

      • python3
      • python3-pip
  • LuCI

    • Applications

      • luci-app-ttyd
      • luci-app-zerotier
    • Protocols

      • luci-proto-3g
      • luci-proto-ipv6
      • luci-proto-ppp
      • luci-proto-qmi
  • Network

    • WWAN

      • comgt
      • uqmi
  • Utilities

    • Editors

      • nano-full
    • Terminal

      • minicom
    • gpsd
    • gpsd-clients
    • gpsd-utils

保存并再次编译

make V=s -j$(nproc)

编译成功后,固件存放在此文件夹中

3. 烧录固件

可以使用 balenaEtcher 或者 Win32DiskImager

4. 配置 Openwrt

连接网线,网段设置 192.168.1.X 或者自动获取

浏览器登录 http://192.168.1.1/

username: root

password: password
就可以进入 Openwrt 后台

4.1 配置 4G 网卡

插入 4G 上网卡

进入 TTYD 终端

查看设备 cdc-wdm0 存在就说明驱动上了

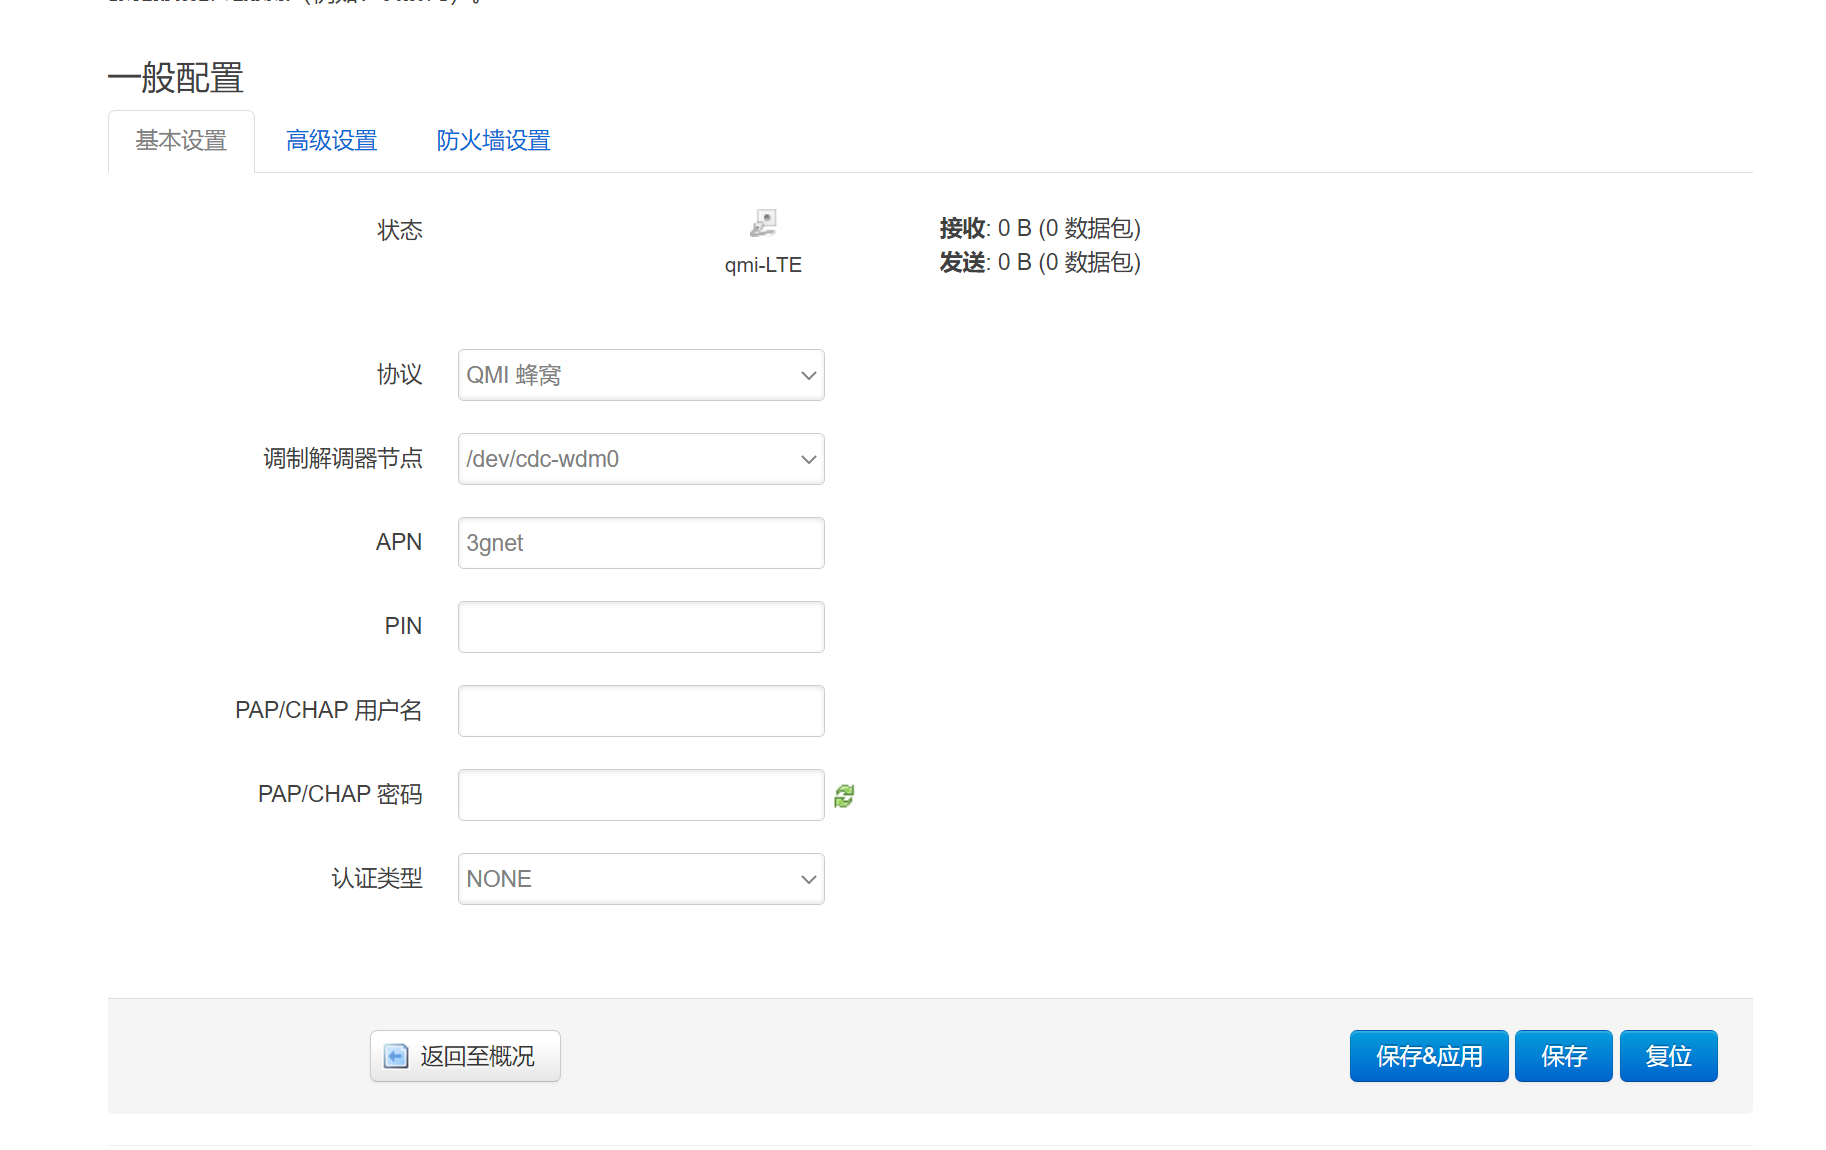
新建一个 QMI 接口

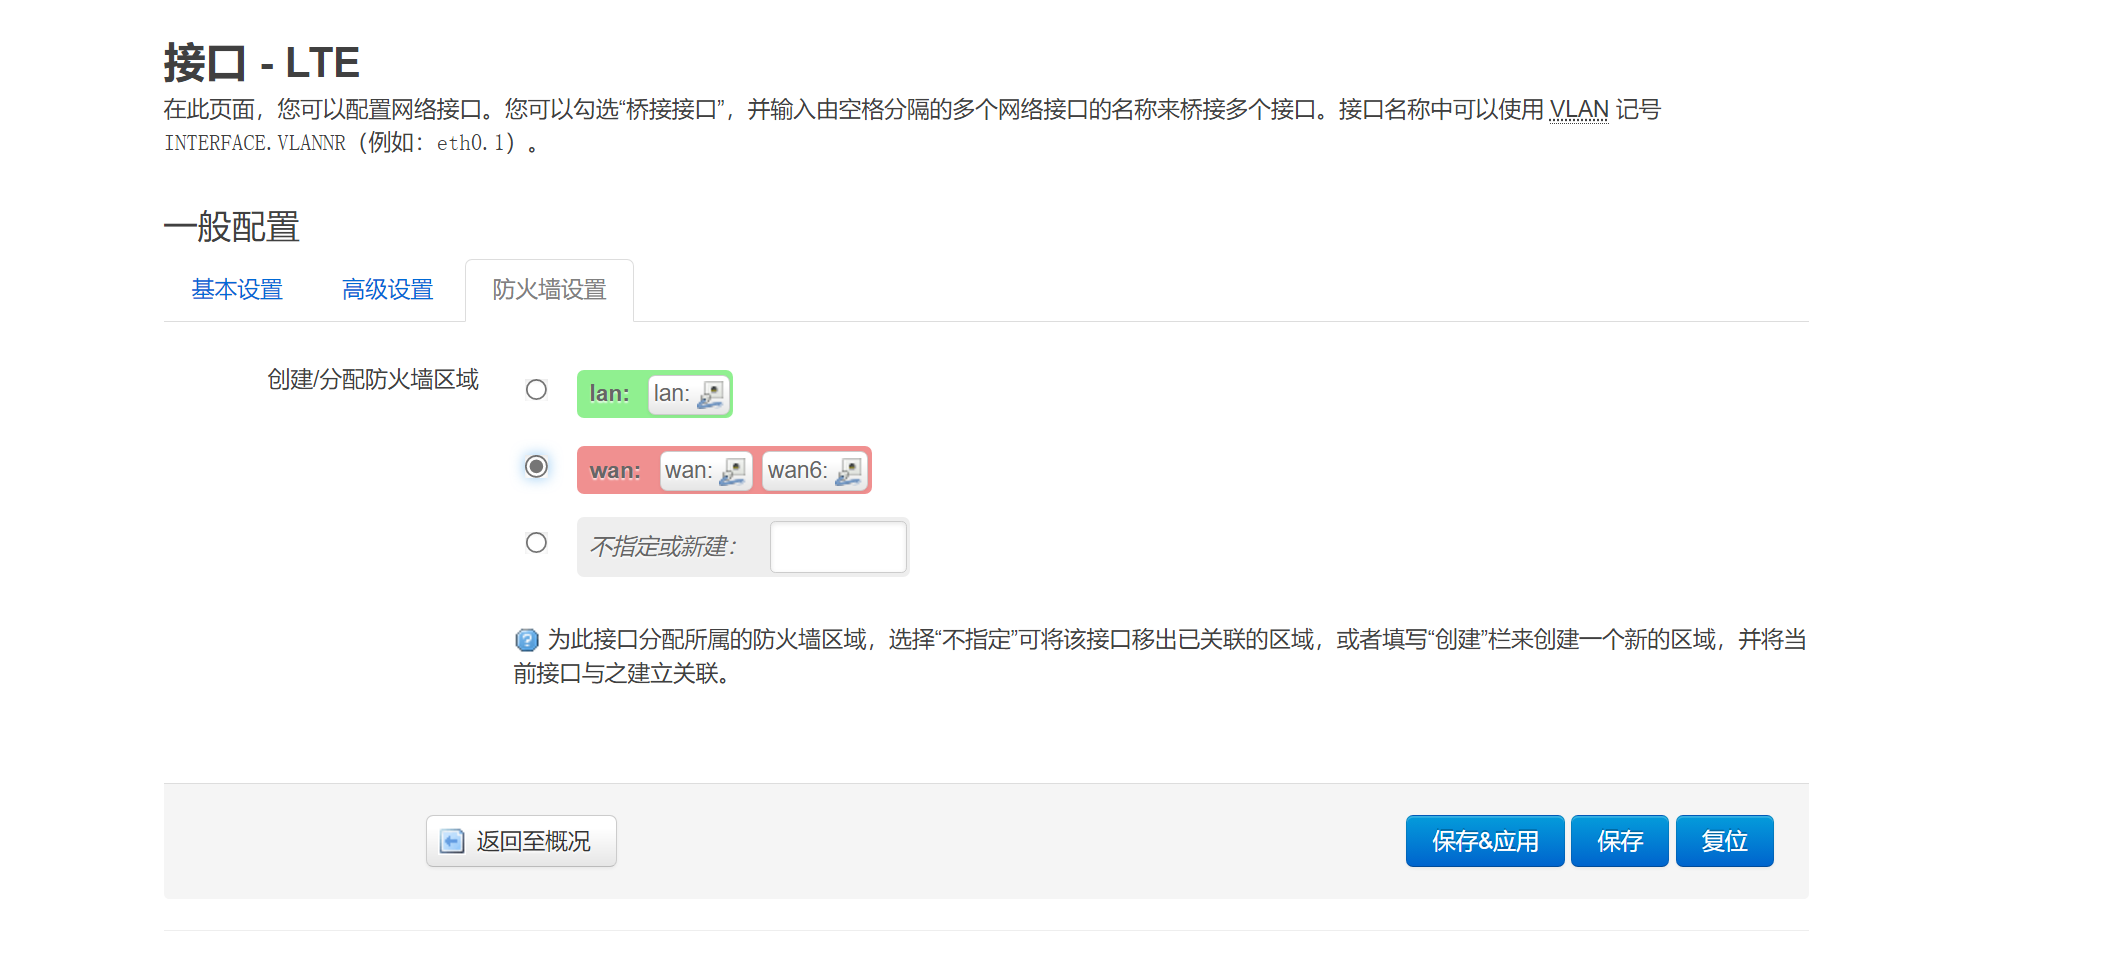
防火墙设置为 WAN
有数据包,说明上网成功

但这还没有获取到 ipv6 地址,需要修改 /etc/config/network 文件

config interface 'LTE'
         option proto 'qmi'
         option device '/dev/cdc-wdm0'
         option apn '3gnet'
         option auth 'none'
         option pdptype 'IPV4V6'  # 增加这一条

重新连接就能获取到 ipv6 地址了

4.2 配置 GPS 模块

修改/etc/config/gpsd配置文件

1 config gpsd 'core'
2         option enabled '1'  # 改为 1
3         option device '/dev/ttyUSB0'  # GPS 的串口号
4         option port '2947'
5         option listen_globally '0'

使用/etc/init.d/gpsd start 与 /etc/init.d/gpsd enable 命令开启gpsd进程并加入自启动序列

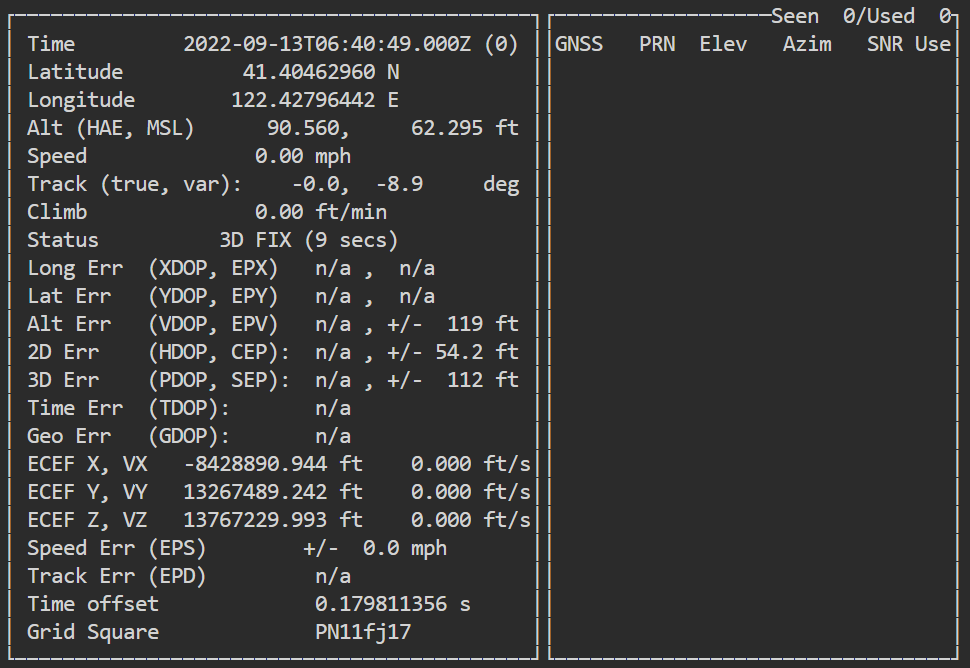
使用 cgps -s 查看 GPS 信息
至此 Openwrt 算是安装结束了,双 LAN 口,zerotier 就自己配置了

最后测一下 4G 的速度(真心疼流量啊!)


赞 (1)

评论区(暂无评论)

这里空空如也,快来评论吧~

我要评论